| Day Sailer Association |
Mid-Boom Sheeting and Rigging on Dumpling, DS #2028, National Champion 1994, 1995, 2010, and 2014
Originally Written By Bob Blake Sr. in 2000. (Recent upgrades and minor changes In Italics by Bob Jr.)
In recent issues of The Day Sailer Quarterly, we’re had two rigging guides for stern traveler set-ups. (See the spring 1998 issue, pp. 45-51, “Good Ship Lollipop,” by Phil Root and the summer 2000 issue, pp. 25-44, “#316 Viejo,” by Ken Reitz and Dave Keran.)
So here’s an account of a classic O’Day Day Sailer with a mid-boom traveler system with descriptions of our other rigging solutions, developed over some forty (now 50+) years. The purpose of this account is to describe in words and show by photos some of the solutions to various rigging problems so an interested reader won’t need to re-invent the wheel when rigging a Day Sailer and go through the trials and errors Bob, Jr. and I did to arrive at a boat that has the controls that work in all kinds of weather and are virtually always available to both skipper and crew on all points of sail.
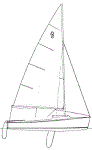
The Blakes have sailed “Dumpling” since 1965 (Photo 1). With a double plank Skaneateles Comet and a homemade wooden trailer as a trade-in, the brand new Dumpling and new Teenee trailer cost $1500. Boy, what a bargain for the fun and excitement all the family has had with this beautiful boat!

Photo 1 – Dumpling in 2011 nationals (Photo by Brett Elizabeth Blake)
Talk about a stock boat! She had mahogany floorboards (We still have them in my garage.), wonderful coaming to prevent water from coming in when we hiked out (but tough on your rear end), jib leads out to the gunwales, a jam cleat for the main sheet on the centerboard trunk, a shaped centerboard and rudder all right—shaped like the proverbial barn doors—and no tiller extension.
A word about originally doing our own rigging. At the Brockport Yacht Club on Lake Ontario, just 18 miles west of the home of daddy Kodak, we had plenty of do-it-yourself tinkerers in our club. And were they clever at creating and re-designing boat “stuff.” So I tried to keep up with them. I fashioned tiller extensions from aluminum tubing but they always collapsed. And many a homemade spinnaker pole fitting bent out of shape in any kind of moderate wind.
I’m a slow learner, but I finally came to realize that I would be better off to let professionals produce all my fittings rather than trying to jury-rig my own parts just to keep up with those “handymen” in our club.
Jib Sheeting
My first move was to take off the jam cleat from the centerboard trunk and get a stainless steel sheet, bend it over the centerboard trunk and bolt it to the thwarts (Photo #2). (By the way, the original thwarts have been replaced with the present oak ones.)
 Photo 2 – Jib sheet arrangement over the CB trunk.
On the stainless steel sheet I installed staggered blocks and fairleads (If you look closely, the two aligned holes on the stainless sheet were for a jam cleat and Bob’s original Barber Hauler). We finally got the angles right for hiking out in weather. (I replaced the original blocks and cleats long ago with Harkens as they became available. Tom Haines, a past national champ, great sailor, and first class nice guy, advised me to replace all by blocks with Harkens. How right he was!)
After reading how one needed to move the jib sheets inboard to about eight degrees from the centerline of the boat in order to point better, I went to work on that problem. (Remember, the original jib blocks were on a very light aluminum track on the wooden coaming. When I asked my six foot two, 200 pound crew, Timmy Donovan, to “trim the jib,” he did and pulled the track right off the coaming!) We’ve replaced the tracks with 1” Schaefer racing T-track with T-track cars with springs (Photo 3). These are through-bolted to the combing and are a mite sturdier than the old aluminum ones.
 Photo 3 – Jib track on combing.
So I copied the rig of a Syracuse University English professor (Jim Scholes) who was beating our pants off because he could point so much better than all the rest of us. He simply tied a line with a block on the coaming, thus moving the jib lead inboard to where it belonged. I thought it was great. And it was for the time. There are a number of systems available, but after much trial and error we have gone to this rig because the jib sheets can be adjusted on both sides of the boat. The crew is able to pull the jib inboard by a line under the cuddy, while when the line is released from the Harken block, shock cord pulls the jib sheet outboard for reaching It then becomes an in-haul or out-haul, whatever is your pleasure (see photos 4 and 5).
Now to our present rig for the jib (Dumpling has gone through a number of iterations of a barber hauler system. The first one described/shown here (photo 4) was copied from Mike Carpenter in 1984. The second one shown (photo 5) was installed after the 2006 nationals in Sharon, MA. The system was changed because the earlier set-up had the barber haul block significantly forward – about 8 inches forward of aft cuddy edge. Given the North Jib, this set up put simply too much curvature in the jib. After Sharon, and with a discussion with Dean Iawashi, the current system was put in place.)

Photo 4 – Mid 1980’s – 2006 Barber Hauler system

Photo 5 - Current Dumpling System (see barber hauler, twing line, and boom vang)
Mid-Boom Traveler
Next, because all the hotshots (at the time) were using mid-boom travelers—the legendary Len Fiock had one—I decided to go to one, too. (It took me virtually all one winter, sitting in Dumpling in my garage, agonizing before I could drill a hole in my beloved yacht. Now, there are so many holes in her that she looks like pieces of Swiss cheese, patched together.)
The original track and car have been replaced with Harken racing track and a Harken windward sheeting traveler car (Photo 6). I can’t praise this system enough. (The windward sheeting car was a game changer and was installed in the mid 1980’s). One of the valid criticisms of the old mid-boom traveler was that one needed to let off the traveler before one tacked and then pull the car to windward after the tack. What a pain!
With the windward sheeting car, after the tack, the leeward purchase releases the car. All one has to do is simply pull the car—and most importantly, the boom—to windward. (It has one flaw and that is in very light air because pressure to release the windward cleat is not strong enough and at times it has to be done manually)
 Photo 6 – Mid-Boom traveler with Harken windward sheeting car.
Notice the mainsheet as it exits a Harken swivel base—so that the lead always faces the trimmer, either skipper or crew--the Harken blocks on the boom and another Harken with becket on the traveler. That’s enough purchase for us. (Yet Natalie Coleman-Fuller has added additional purchase for heavy weather Pleasant Bay sailing. Much like is done in a Hobie Cat). Bob Jr. has added wooden supports on either side of the centerboard trunk, with the aluminum bar screwed and glued into these supports. Both ends of the aluminum bar are attached through the deck under the combing by bolting through approximately 2.5 inches of deck. Len Fiock suggested this for two reasons.
1) It would be very sturdy, and
2) It would provide lateral stability for the boat.
There’s a lot pressure on the traveler when the air is honking and with this arrangement the aluminum traveler bar is going nowhere.
There’s always been a heated debate about the mid-boom versus the stern traveler. Long ago, Dan Duggan removed his mid-boom traveler and went to the stern traveler. He and Barbara Duggan-Foot do all right with the stern rig (with Cherry Bomb having won three national championships), thank you very much. And Phil Root has not disgraced himself with the stern traveler. (The influx of Thistle sailors has brought in era of “end-of-boom” mainsheet and using a 21:1 Vang for “vang sheeting.” The system has proven successful with national championships among Dave Keran and Janette Zeman , Mike and Mardi Gillum, and now Craig Lee and Mary Niederberger).
However, Len Fiock, the all-time DS champ has always had a mid-boom and when Bob, Jr. asked Len, “How do make this traveler work?” Len replied, “Just get used to it, Bob.”
Those who win with the stern rig say the boat is cleaner and much easier to get around in. They’re right. And in light air, all things being equal, the stern traveler skippers may have a slight edge over us mid-boomers because of ease of moving around in the boat. Bob, Jr. and I believe, though, that when the air pipes up, the mid-boom is a distinct advantage. Essentially, when one yanks on the mainsheet with the boom moved to centerline, the upper part of the flexible Epsilon mast (as well as the E and Beta-minus sections) bends, thus flattening the main and freeing the leech of the sail. This lets us keep the boat flat and moving to windward. When the wind gets even heavier, we simply let the car—and thus the boom—to leeward, allowing the upper part of the mainsail to twist off to leeward and again letting us keep the boat flat.
The other complaint about the midboom is that it makes for a very crowded cockpit. It sure does! In Dumpling, the skipper sits forward of the traveler, and the crew sits forward of the thwart. But, that’s exactly where you want your weight! Right in the center of the boat, especially when going to windward. (Except, of course, in planing conditions, but that’s a whole other story.)
Other Controls
Now to other controls of Dumpling (seen earlie in Photos 4 and 5). The top chock of wood glued to the underside of the cuddy with the Harken cheek block and Harken block with risers holds the line for the port adjustment for the jib inhaul/outhaul sheet. On the mahogany coaming, the top line controls the Cunningham adjustment on the main. The middle line adjusts the vang, and the bottom line is for the jib Cunningham (Photo 7).
 Photo 7 – Cunningham and jib luff. Middle line is Vang but that has since been moved topside
Jib Cunningham
A word about the adjusting the tension of the jib luff. Many sailors use a Harken magic box or other means to adjust the tension of the jib luff. For them, the jib halyard becomes the jib Cunningham for luff adjustments.
For Dumpling, we drilled a hole in the stainless steel bow plate and led the jib Cunningham wire through the bow plate to a wire block below deck with lines leading to the control panels on both port and starboard. The wire forestay is adjusted through the Stay-Master turnbuckle. Then the jib luff wire is snugged as tight as possible on the deck for going to windward and let off very simply and effectively for sailing off the wind (Photo 8).
 Photo 8 – Jib luff wire at stem fitting.
Main Cunningham
The main Cunningham can be adjusted by the crew on either the port or starboard tack (Photo #9 and # 10) Modeled from an old Lands End catalogue (yes, Lands End was equipment before it was clothes and duffels) a stainless steel bail through the Cunningham hole in the luff of the mainsail holds two Harken blocks with lines to another block on a mast bail, which lines are then led through thru-deck Harken blocks on either side of the mast back to the top line of the port and starboard control panels. (The lines are color-coded, but they don’t show up here in black and white photos).

Photo 9 – Cunningham design taken from a Land End catalogue from 1960’s.

Photo 10 – Shows cunningham and vang set up on boom and mast.
Boom Vang
The boom vang, also shown in Photo 10 has a triple Harken block on the boom, a triple Harken on a mast bail with the line exiting through a RWO screw down thru-deck bushing to a Harken block below deck, to the vang lines run through a double Harken block up to two more Harken blocks on a stainless steel eye strap under the cuddy to the port and starboard lines on the control panels (Photos 11 and 12). Such an arrangement looks complicated, but it offers plenty of purchase, and the crew can adjust the vang simply and efficiently while hiked out. (Photo 13 shows the latest vang control location. Pretty scary to drill a ½+ hole into the deck for this setup but it was worth it)


Photos 11 and 12 – Vang lines below deck and forward line is jib luff adjustment
 Photo 13 – Circle shows new location of vang control line. This is a through deck cleat arrangement. Again, crew can adjust for either side
Spinnaker
The spinnaker bags (seen throughout) on both port and starboard, just under the cuddy, are bags originally made for Thistles. They’re right about where they should be for us. The shock cord holds both bags open so the chute can be hoisted and stuffed quickly and easily for both leeward and windward use.
We’re tried everything to hold the spinnaker! We’ve had different sizes of single milk cartons, tied to a line from shelf to shelf so we could move the carton back and forth for port or starboard takedowns. We even had the “tube,” but the contraption really does destroy a chute. Unless you spray a lubricant on the spinnaker and inside the tube, the sail frequently sticks, the takedown patch spoils the shape of the spinnaker, and it doesn’t really save that much time. Besides, as Bob, Jr. maintains, it just looks ugly!
The spinnaker sheet is (was) continuous, led through a Harken in-line exit block through the coaming just forward of the traveler bar through a Harken Hexaratchet under the gunwale. When the wind pipes up, the crew puts on the ratchet to help hold the sheet. The clam cleat on the coaming simply holds the spinnaker line out of the way when not in use.
Just aft of the shrouds (controlled by adjustable Sta-Master turnbuckles ) are guy hooks with rubber gates, held by thru bolts and two screws. (Photo #14) The gates are turned inboard so the spinnaker guy won’t accidentally fall out. Aft of the guy hooks are Harken blocks with homemade wooden flat and Harken wedge risers. There are no fairleads on the Harken blocks so the guy can be snapped in or out easily. The continuous spinnaker lines are led aft internally and exit from Harken thru-deck bullet blocks. (Dumpling now has twing lines, as seen in earlier photo)
Photo 14– Spinnaker guy arrangement. Reaching hook opening is facing inward. Makes a big difference (Dumpling now has twing lines. Also, if you look closely you can see the location of the former barber hauler and the shock cord. This system worked well for a number of years, allowing us to win two national championships.)
The uphaul and downhaul for the spinnaker pole are formed by a continuous line with a brass snap hook attached to a single strap. We’ve tried many different spinnaker poles (including homemade ones), and the Proctor is simply the strongest and easiest one to handle. RWO ends work perfectly because they can be jammed into the mast eye. We’ve gone large with the pole, 1.5 inches in diameter, and have never regretted the decision. It was the best $90.00 ever spent on the boat. The single strap on the pole is up and the jaws—which are released by the line under the pole—are aimed down. You simply attach the snap hoop to the strap on the pole, push the pole out to the guy, pull the line to release the jaw, attach the jaw to the guy, and attach the other jaw to the spinnaker pole bail.
A word about the solid line for topping lift and downhaul. We’re tried shock cord for the topping lift, which is okay in light air. When the air picks up, and the shock cord loses its elasticity, though, you no longer have control of the spinnaker pole. This situation is deadly in moderate to heavy air! In addition after using S hooks, we’ve gone to the brass snap for the pole attachment. With the S hook there is nothing more frustrating than jibing the spinnaker and ending up holding a spinnaker pole with nothing attached to it.
The topping lift and downhaul are led to Harkens on the deck and back to Harkens on the cuddy. Port is for the topping lift. Starboard is for the downhaul. When setting pole, all one need to do is uncleat the starboard line (downhaul) and up the pole goes. The height is automatically set with the topping lift.
Other Considerations
For this discussion, we’ve dealt almost solely with rigging, but there are other vital considerations if you want a competitive Day Sailer.
1. A stiff, fair hull is a must. If you’re clever, you can do this yourself, or you can have a professional do it. The old hulls, as mine did, become mushy with age. Believe me, mushy is not fast. (Dumpling has been stiffened two times)
2. It’s crucial to have a boat that weighs around the minimum weight, 575 pounds. A heavy boat is decidedly not fast. Check with the DS Handbook and Handbook Supplement and talk with the top sailors before you do anything to make your boat lighter. You can do many simple things, though. For instance, I removed 30 pounds of water-soaked foam within my fiberglass seats by simply cutting inspection ports and removing the foam. I replaced the sodden sticks of foam with Holt Allen buoyancy bags. (And now, pool noodles work great!)
3. Your foils—centerboard and rudder—are vital. I shaped my original foils with cloth and glass. They had a nice shape, but they were very heavy. Cape Cod Shipbuilding sells Lindsay foils at a decent price, and Ron Pletsch of Sarasota Sailing Squadron makes lovely foils for a good price, too. (Dumpling sails with a Lindsay set and a Watterrat set).
4. Any reputable sailmaker will build you a fine suit of sails. However, you need to spend a considerable slice of time adjusting sails to your particular mast and boat. Sailmakers supply a tuning guide, but don’t follow the guide slavishly. Len Fiock of the Santa Cruz fleet, Dan Duggan of the Marblehead fleet, Steve Braese, independent, and Bob Blake, Jr., independent, all can help you with tuning your Day Sailer. We’re had all kinds of sails on Dumpling: Hood, North, Marblehead, Ulmer Kolius, Doyle, Cressy-Doyle, Jotz, and we’re back to North sails with Greg Fisher’s courteous and expert assistance. But I warn you, it has taken a year to get our new sails where we want them with our particular mast and rigging.
Conclusion
On the one hand, the Day Sailer, for the most part, does not come fully rigged for racing as do dinghies like the JY-15, the Vanguard 15, the Flying Scot, the Lightning, or the Thistle. On the other hand, though, I believe if you make the DS ready for racing by installing all the necessary controls, you will have learned more about small boat dinghy racing than have those who have jumped on a race-rigged boat without learning how and why each item works.
What are significant for successful racing in any boat are, of course, it almost goes without saying countless “hours on the water” in all kinds of weather. But no matter how good a sailor you are, you are only as good as your equipment.
To that end you need all the necessary controls. The adjustments must be easily available on all points of sail and in all conditions. You must be confident that the controls will not break—let you down when you need them most—and they must be in places so familiar to you that you barely need to think when you use them. (The adage we use is, Build it so it don’t break”).
When your boat is tuned precisely for you, you have all the necessary controls, you know where they are and are confident they won’t fail you, you are free to concentrate on sailing well. And when you are sailing well—when you’re “in the zone”—the winning will take care of itself. Of course, at that point, you’ll realize that winning is not the point at all—sailing well is.
Rigging a Winning Day Sailer
Note: this guide depicts rigging for a Day Sailer I, though there should be many similarities with other Day Sailers by Phill Root, 1997 National Champion, G.S. Lollipop When setting up the Lollipop for racing from a completely stock 1966 Day Sailer, the goal was to keep the boat as simple as possible and still be raceable. After racing this boat for 7 years in all conditions, except ocean waves, with a variety of crews from 9 year olds, to friends from work, the systems described have worked very well and have been very competitive. Wherever an improvement is contemplated, I always weigh the sacrifice in comfort and "daysail-ability" versus the possible racing benefits. Main sheet system and traveler Mainsheet cleat is a Harken Hexarachet placed on the original location. When racing this can create an awkward angle, but it keeps the The traveler is a fixed triangle of line, using the stock blocks on the rear deck and a hook inside the coaming to hold the knot where the two ends come together. The center block is about 22" above the deck, always centered when going upwind. When setting up the height for this block, some trial and error can improve performance. When sailing in wind about 3-5 knots, no vang tension, the main sheet should only pull the boom in and out, not down, until the boom is about 9-12" off center, then the boom should be pulled down and in equally, with added sheet tension. When there is enough wind to need more leech tension, the boom vang is used to keep the leech where you want it and the main sheet is used for in-out boom position only. Tacking requires only mainsheet adjustments. Downwind, when I remember, the traveler knot is released from the hook to shorten the amount of mainsheet needed to broad reach or run. Also shown in this picture is my spinnaker halyard going to the transom and then forward to a floor mounted cleat and bullseye at the end of the centerboard trunk. Jib Halyard This is the 3:1 Jib halyard tensioner. I use jibs with a luff rope in The two gray Clam cleats on the aft edge of the cuddy are for the barber in-haulers. Forward Deck Layout This shows everything rigged. At the bottom is the jib sheet running from the seat cleat w/bullseye to stock fairlead on the inside edge of the coaming (hasn't been adjusted in three years), then through The area on top of the cuddy looks a little complex, but with a little thought, everything stays untangled and runs free. Notice entire cuddy is open and available for ice chests, sleepy children or the laundry basket we use for spinnaker storage. On the top edge of the centerboard trunk you can see the two mini cleats we use for the spinnaker sheets. Spinnaker pole controls Two rings on the mast, one about 24" above the deck, used only in very light wind, and the other 46" above the deck used all other times. The topping lift goes to a sheeve about 2’ above the spreaders. (By the way, my spreaders are 21" long and free swinging). On my previous mast, the topping lift was external and worked much better. The topping lift then goes below deck to the base of the The pole down haul is about 2' of 1/4" bungee cord (the good stuff) and the rest is 3/16" line. This goes through a hole in the forward edge of the cuddy and then aft to a clam cleat mounted to the inside roof of the cuddy under the vang cleat. When the pole is moved fore and aft, the bungee cord absorbs the length differential created by having the bottom of the down guy so far forward of the mast. The advantage here, is, the forward down guy helps pull the pole toward the corner of the spinnaker when it sometimes slips aft. Also shown is the spinnaker sheet going under the reaching hook to the guy cleat used by the adult crews strong enough to trim from this position. The "hook" is unique. It is a Harken becket roller, thru-bolted to the shroud attachment in lieu of a clevis pin. Whenever the pole is forward of about 45 degrees the line stays under the roller. When the pole is pulled further aft, it does pop out of its own accord, but hooking the guy is not necessary when the pole is carried that far aft. Also an advantage is when jibing, this "hook" auto releases. No more trips to leeward to release a forgotten line. The hook can also be seen in picture 3. Looking up to the boom, the 12:1 vang can be seen. It is a 6:1 using triple blocks and then doubled with a single cascade. Just forward of the vang, the 3:1 internal outhaul cleat is shown. A useful trick to keep the outhaul tail out of the crews hair (literally) is to use a piece of 3\16 bungee cord tied to the end of the line and out to the clew. This sucks up the slack and also can be used to pull the clew in when trying to release it. (some of this cord can be seen in #1) Spinnaker Halyard at Mast Base This shows the 1:2 (reverse) spinnaker halyard. The red line goes to Spinnaker Control Lines The red line is the spinnaker halyard and cleat. The Yellow line under starboard seat is the topping lift and cleat. The cleat on the side of the Well, there it is, everything that makes the Lollipop go. There are certainly ways this rigging can be improved for racing, or things that can be further simplified for daysailing. But, for our family, we like the G.S. Lollipop just the way she is. |
 mainsheet clear of jib and spinnaker sheets for fewer tangles.
 them instead of a wire. That means the halyard becomes the jib cunningham for luff adjustments. The cleat in the center is for the boom vang. The empty cleat to the left is for the main cunningham.
 the barber hauler(pink line at edge of cuddy.
 mast, thru a block and then directly to a cam cleat mounted under the starboard CB seat (shown on pictures 3 & 6).
 the transom and then forward to a cleat and bullseye shown on pictures 1 & 6. This system pulls the chute up 2' for every 1' pulled. The yellow line on the other side of the mast is the topping lift. The white line with many knots is the forward attachment of the hiking straps.
 centerboard trunk is the centerboard hold down, used only to keep CB in place when reaching. The port coaming shows the thru-deck block used for the spinnaker sheet which then goes to the two cleats on the CB trunk cap.